Wooden Bookcase Bench Workspace Ideas for Home

wooden bookcase bench: Benefits of a multifunctional bookcase bench

Finding the perfect balance between storage and surface area can be difficult when your home office feels cramped or disorganized. A wooden bookcase bench is an ideal solution for those who need to maximize every square inch of their living space without sacrificing style. By combining a sturdy seating surface with vertical shelving, this piece serves as a multi-functional workspace that anchors a room while keeping your essentials within reach.

In this guide, we will explore how to design and organize a versatile workspace that promotes both productivity and comfort. You will learn about the essential components needed for deep focus, the design elements that create a relaxing atmosphere, and practical layout tips to keep your belongings tidy. Whether you are looking for study nook design inspiration or planning a wooden furniture makeover, these ideas will help you create a personalized hub for work, reading, and creativity.

In this article:

Benefits of a multifunctional bookcase bench

For many homeowners, the primary challenge of interior design is maximizing utility without overwhelming the visual flow of a room. A wooden bookcase bench serves as a premier example of multi-functional furniture because it bridges the gap between storage, seating, and a dedicated work surface. Instead of cluttering a small room with three separate pieces—a bookshelf, a stool, and a desk—this single unit consolidates those needs into one cohesive footprint.

Space Efficiency and Versatility

In apartments or smaller homes, every square inch counts. A wooden bookcase bench provides a "zone-based" approach to organization. The lower section often serves as a sturdy seat or a place to set down heavy items, while the upper shelves provide vertical storage for books, decor, or office supplies. This verticality allows you to keep your workspace tidy by moving non-essential items off the main surface and onto the surrounding shelves.

Adaptable Work Zones

One of the greatest advantages of this piece is its ability to transition between different tasks throughout the day. During a busy morning, it can function as a primary desk for laptop work or writing. In the afternoon, it might serve as a reading nook where you sit with a cup of coffee and a novel. Because it combines these roles, your workspace remains flexible; you are not locked into one specific activity, allowing the furniture to evolve with your needs.

Visual Harmony in Home Office Ideas

From a design perspective, using a wooden bookcase bench creates a sense of continuity. When your storage and seating are integrated, the workspace feels more intentional and less chaotic. It acts as an anchor for a study nook design, providing a structured area that feels like a "destination" within a room rather than just a scattered collection of furniture.

Essential components for deep focus

Creating a workspace that fosters deep focus requires more than just a flat surface; it involves a deliberate arrangement of components that minimize distractions while maximizing utility. When designing your wooden bookcase bench for concentration, you must consider how the physical elements interact with your workflow.

Optimized Surface Area

The primary surface of your wooden bookcase bench serves as your immediate "thinking space." For deep focus, ensure the depth is sufficient to hold a laptop or notebook while leaving room for a cup of coffee or a notepad. A standard depth of 12 inches (305 mm) to 14 inches (356 mm) is usually ideal. If you are a multi-tasker who needs to spread out large blueprints or multiple books simultaneously, consider a wider bench and use the lower shelves to keep secondary items off the main work plane.

Layered Storage Solutions

A cluttered environment often leads to a cluttered mind. Your bookcase bench should utilize vertical space to store tools, reference books, and stationery. By keeping frequently used items within arm's reach on the middle shelves and less-used items on the top or bottom tiers, you reduce the "visual noise" of your workspace. Use bins, baskets, or small dividers to group related items together, which helps in transitioning quickly between different types of tasks without losing your place.

Targeted Lighting

Proper lighting is non-negotiable for sustained concentration. A wooden bookcase bench benefits greatly from a combination of ambient light and task lighting. While overhead lights provide general visibility, a dedicated desk lamp or a small adjustable spotlight directed at your primary work area reduces eye strain. Consider the color temperature; warmer tones (around 3000K) are excellent for creative tasks, while cooler, whiter tones can help maintain alertness during heavy study sessions.

Ergonomic Support

Even though a bench is often lower than a standard table, your seating and posture determine how long you can stay in the "flow state." Ensure the height of your wooden bookcase bench allows for comfortable arm placement. If you find yourself leaning forward too much, consider adding a small footrest or choosing a chair that supports your lower back. Proper ergonomics prevent physical fatigue from breaking your mental concentration.

Design elements for relaxation

Creating a wooden bookcase bench that serves as a relaxation zone requires a shift in focus from pure utility to sensory appeal. To make your workspace feel like a sanctuary rather than just a desk, you must consider how different textures and colors interact with the wood grain.

Texture and Materiality

The tactile experience of your furniture significantly impacts how calm you feel while working. For a relaxation-focused bench, choose woods with smooth, satin finishes rather than high-gloss lacquers, which can sometimes feel clinical. Incorporate contrasting textures to break up the visual monotony.

  • Pair a solid oak bookcase bench with a soft linen seat cushion to balance the hard surface of the wood with a cozy fabric.
  • Consider adding a woven wicker basket on one of the lower shelves to introduce an organic, earthy texture.
  • Use a smooth-sanded maple top for your workspace area, as it provides a consistent, comfortable surface for your hands and forearms.

Color Palettes

Color choices can dictate the mood of your study nook design. While natural wood tones are inherently grounding, specific hues can enhance the feeling of tranquility.

  • Soft neutrals like beige, cream, and muted greys work beautifully with light woods like pine or ash to create an airy, peaceful atmosphere.
  • For a deeper sense of focus, darker hardwoods such as walnut provide a sophisticated, "library-like" feel that feels secure and warm.
  • If you prefer a pop of color, choose "earth tones"—sage green, terracotta, or dusty blue—which are less taxing on the eyes during long periods of reading.

Relaxation Accessories

The final layer of your wooden bookcase bench design involves the small details that turn a piece of furniture into a curated retreat.

  • Place a small ceramic vase with dried eucalyptus or lavender to introduce a subtle, natural element and a hint of fragrance.
  • Integrate dimmable task lighting, such as a brass swing-arm lamp, to create a warm glow that reduces eye strain during evening sessions.
  • Use decorative bookends made of smooth river stones or polished brass to hold your favorite reads in an organized, pleasing manner.

Organizing your bookcase bench layout

Organizing your wooden bookcase bench layout is the difference between a cluttered surface and a streamlined workspace. To maximize efficiency, you must treat your furniture as both a storage unit and a primary work surface. Start by categorizing your items into three zones: frequent use, occasional use, and long-term storage.

The Primary Work Zone

The area directly in front of where you sit should be kept relatively clear to allow for movement. Place your most-used tools—such as a favorite pen, a notebook, or a tablet—within easy reach. If your bench has a dedicated desktop surface, try to keep it 80% clear during active work sessions to reduce visual noise and mental fatigue.

Vertical Storage Strategy

Utilize the vertical height of your wooden bookcase bench to organize your reference materials. Arrange books by frequency of use: place your "daily drivers" (the books you grab every day) at eye level or on the shelf closest to the bench surface. Place less-used books, such as decorative pieces or seasonal references, on the higher and lower shelves.

Tool Grouping and Accessibility

For a multi-functional workspace, grouping similar items together prevents you from searching for tools. Use small bins, trays, or dividers to keep smaller items like paperclips, markers, and scissors from rolling around. Placing these in a dedicated tray on one side of the bench keeps them organized while leaving the rest of the surface free for larger projects.

The Flow of Movement

Consider how you move your hands and eyes across the bench. Arrange your layout so that items move from left to right, following the natural flow of reading or writing. Ensure that the heaviest items are placed on the bottom shelves to provide a stable center of gravity for your furniture.

Common mistakes in workspace design

When designing a workspace integrated into your home, it is easy to focus solely on aesthetics while overlooking the practical ergonomics that make daily work productive. One of the most common mistakes beginners make is failing to account for surface clearance and clutter. A wooden bookcase bench can quickly become overwhelmed if every available inch is filled with decorative items, leaving little room for actual tasks like writing or typing. To avoid this, establish a "primary zone" on your bench—a clear area where you do the majority of your work—and keep secondary items organized in the surrounding shelves.

Poor Lighting and Shadowing

Many DIYers overlook lighting as a fundamental design element. If your workspace is tucked into a corner or against a wall, it may suffer from inconsistent light levels. Relying solely on overhead ceiling lights can create harsh shadows across your work surface. Aim for a combination of ambient light and task lighting, such as a dedicated desk lamp, to ensure you have clear visibility for reading and detailed projects without straining your eyes.

Inadequate Work Surface Depth

A frequent error in choosing a wooden bookcase bench is selecting a unit that is too shallow. While a narrow bench saves floor space, it may not provide enough depth for large items like a 15-inch (380 mm) laptop or a stack of open textbooks. Ensure your workbench surface has at least 12 inches (305 mm) of depth to allow for comfortable movement of your arms and tools.

Ignoring Ergonomics and Reach

Designers often forget the "reach zone," which is the area directly in front of you that can be accessed without leaning forward too far. If your most-used items are placed on high shelves or at the very back of a deep bookcase, you will find yourself constantly reaching and shifting your posture. Place your daily essentials—pens, notebooks, and frequently used tools—within easy reach to maintain a fluid workflow.

Frequently Asked Questions

How can I make a bookcase bench feel less cluttered?

To keep your wooden bookcase bench from feeling cluttered, utilize the vertical space by organizing books by size or color. Use decorative baskets or bins on lower shelves to corral smaller items like pens and notebooks. Finally, practice "editing" your display; only keep your most-used items at eye level while storing less frequent pieces in the back.

Final Thoughts

Integrating a wooden bookcase bench into your home is a smart way to maximize square footage while creating a dedicated zone for both productivity and organization. By combining storage, seating, and a work surface into one cohesive piece, you create a multi-functional workspace that adapts to your daily needs. Remember to prioritize ergonomic height, choose materials that suit your personal style, and organize your layout to minimize clutter.

To get started tonight, take out a piece of paper and sketch a rough layout of where your wooden bookcase bench could sit in your home. Identifying the perfect spot is the first step toward creating a functional study nook or a peaceful corner for relaxation.

Share:

Beginner's Blueprint for Selling Your First Wooden Project

beginner's blueprint: Introduction to Selling Wooden Projects

Begginer's Blueprint for Selling Your First Wooden Project: Are you a woodworking enthusiast eager to turn your skills into profit? This guide is designed just for you—someone looking to embark on their first venture in selling woodwork. Whether you're a hobbyist or a budding craftsman, this blueprint covers everything from selecting the right project to crafting it beautifully and pricing it thoughtfully—all with the aim of successfully selling your wooden masterpiece.

In this article:

Introduction to Selling Wooden Projects

Embarking on the journey to sell your first wooden project is both exciting and daunting. The process of crafting something by hand can be incredibly rewarding, but turning that craftsmanship into tangible income requires careful planning and execution. This "Beginner's Blueprint" aims to guide you through the essential steps from choosing a project to selling it effectively.

The importance of selling your wooden projects cannot be overstated. Not only does it provide financial gain, but it also allows you to share your skills with others who appreciate handmade items. Each sale is an opportunity to grow and improve not just in woodworking techniques, but in business acumen as well. Whether you're a seasoned craftsman looking for new avenues or a beginner eager to make something concrete out of wood, this blueprint will help ensure your first project turns into the start of many successful sales.

Choosing Your First Project

When embarking on your journey to sell your first wooden project, selecting a beginner-friendly design is crucial. This ensures that you can focus on mastering essential woodworking skills without being overwhelmed by complexity. Here are some tips to help you choose the right project:

  • Simplicity: Opt for designs with clean lines and straightforward construction techniques. Projects like basic boxes, simple shelves, or small planters offer a good starting point as they require fewer tools and less time investment.
  • Ease of Assembly: Choose projects that involve easy-to-follow instructions and straightforward assembly methods. Avoid complex joints or intricate patterns until you're more experienced and confident with your woodworking skills.
  • Safety: Ensure the project is safe to work on, especially for beginners. Avoid designs involving sharp edges unless they can be safely sanded down after completion. Opting for rounded corners instead of sharp ones can make a significant difference in safety.
  • Time-Saving Materials: Select projects that use readily available materials and minimize waste. Plywood or MDF are great choices as they are easy to cut, glue, and sand without producing excessive scraps.
  • Personal Interest: Choose a project you're passionate about. This not only makes the process more enjoyable but also helps in improving your skills over time. When you're excited about what you’re making, it’s easier to learn new techniques and work through challenges.

Remember, the key is to start with something that allows you to focus on mastering fundamental woodworking techniques without being bogged down by overly complicated designs or safety risks. As your skills grow, you can gradually tackle more complex projects but always ensure they remain within your current skill level and comfort zone.

Crafting Your Project

To start crafting your first wooden project as part of your beginner's blueprint for selling it, begin by selecting materials that are suitable for beginners. Opt for softwoods like pine or fir due to their forgiving nature, which makes them easier to cut and shape. Once you have chosen the wood, take some time to plan out your design on paper or with digital tools before cutting any material. Next, gather all necessary tools: a saw, sandpaper of varying grits (from fine to coarse), a ruler, and a pencil for marking measurements. Begin by measuring and marking where cuts will be made. Use the saw carefully according to these marks; practice makes perfect but start with straight lines as they are less likely to result in frustration or damage. After cutting your pieces, move on to sanding. Start with fine grit sandpaper to smooth out rough spots from cutting. Work methodically over all surfaces until you achieve a consistent finish across the wood surface. Then switch to medium and coarse grits to remove any remaining roughness, ensuring each piece is smooth enough for finishing. Once your woodwork is sanded down evenly, it’s time to add some finishing touches—like a coat of stain or varnish—to enhance its appearance and protect the wood from wear over time. Choose a finish that complements the natural color of the wood while also providing protection against moisture and scratches. Apply multiple coats if necessary for maximum protection. Finally, consider how you will assemble your project. Depending on the complexity of design, use screws, nails, or glue to connect parts together securely. Double-check your work before adding any final touches like hinges, handles, or decorative elements that might be needed based on its intended function or aesthetic appeal as a craft item. With each step completed methodically and thoughtfully, you'll build confidence in yourself as an emerging woodworker while creating something unique and beautiful that could potentially become part of your selling portfolio once it's finished. Remember: patience is key when starting out in woodworking; don't rush through steps or force things that aren’t quite right yet. Happy crafting!

Finishing Your Woodwork

When it comes to selling your wooden projects, giving them a professional finish is key in catching potential buyers' attention. There are several techniques you can use to achieve that polished look without needing extensive experience. Firstly, consider using varnish or polyurethane on your project. These finishes not only add shine but also help protect the wood from water and wear. Ensure you apply them evenly for a smooth surface; two coats will usually do the trick. Be sure to read the manufacturer’s instructions carefully as they can vary in application process. Another technique is applying paint. If you’re looking for a more unique or specific aesthetic, painting your project could be the way to go. Choose colors that complement each other and think about the finish – a glossy paint gives a different look compared to a matte one. Always test your paint on a small area first to ensure it’s what you want. For those who are interested in preserving the natural appearance of their wood, an oil-based finish like linseed or tung oil might be more suitable. These finishes enhance the beauty of the wood and provide protection against moisture without the sheen of varnish or polyurethane. Additionally, consider sanding your project lightly before applying any finish to ensure a smooth surface that looks professional when you're done. A fine grit sandpaper can help achieve this goal smoothly. Remember, practice makes perfect in woodworking. Each project is an opportunity to learn and improve your skills. Don't be afraid to experiment with different finishes or techniques – the more experience you gain, the better your projects will look.

Pricing Your Project

When it comes to selling your first wooden project, determining the right price point is crucial. It’s important to find a balance between setting a price that reflects the value of your craftsmanship while also making sure you can sell your item at a profit. Here are some guidelines to help you with pricing:

  • Research Similar Products: Look online for similar projects and compare their prices. This will give you an idea of what consumers in your area might be willing to pay.
  • Consider the Cost of Materials and Labor: Factor in the cost of materials used and estimate how much time it took you to create the project. Adding a profit margin on top of these costs can help ensure that you are not working at a loss when selling.
  • Set Your Price Based on Market Demand: If your project is highly sought after or if there’s limited availability, you might be able to charge more. Conversely, if it’s common and many people make similar items, consider pricing lower.
  • Use Pricing Strategies:
  • Markup Pricing: Add a percentage of what materials cost.
  • Cost Plus Pricing: Charge the total amount that includes your labor costs plus a markup for profit.
  • Competitive Pricing: Price your item to match competitors’ similar items, especially if you’re not sure about demand or market position.
  • Be Transparent: Communicate clearly with potential buyers regarding any additional services like customization or delivery fees.

By following these guidelines and strategies, you’ll be better positioned to set a fair price for your wooden project that reflects its value while also ensuring profitability. Remember, pricing is an essential part of selling anything, so take the time to get it right!

Selling Your Wooden Project

  • Strategies and Platforms to Reach Potential Buyers: Selling your first wooden project can feel like navigating uncharted waters, but with some strategic planning and by leveraging various platforms, you can attract a wider audience. Start by identifying the type of buyers who might be interested in your work—woodworking enthusiasts, DIYers, or perhaps even those looking for unique home decor pieces.
    • Online Marketplaces: Websites like Etsy, eBay, and Amazon are goldmines for artisans. These platforms offer a global reach and can help you connect with buyers from various parts of the world. Make sure your listings are clear about what kind of woodwork it is, its dimensions, materials used, and any unique features or stories behind it.
    • Local Flea Markets: If you're in a community that hosts flea markets regularly, consider selling there. These events offer a chance to connect directly with local buyers who appreciate handmade goods. Make sure your booth is visually appealing, with clear signage and perhaps even samples of your work for potential customers.
    • Social Media: Platforms like Instagram and Facebook can be powerful tools in showcasing your projects. Use these platforms to share photos of your project during different stages, from the initial design to the final product. Engaging with followers by responding to comments and questions helps build trust and encourages purchases.
  • Networking: Consider joining local woodworking clubs or groups where you can network and potentially sell directly to members who might be interested in your work. Attending workshops, classes, or events related to woodwork can also provide opportunities to meet potential buyers.
    • Word of Mouth: Often overlooked but incredibly effective, word-of-mouth marketing is powerful. If a buyer has an exceptional experience with you and your woodwork, they may recommend your work to others, potentially leading to more sales.
    By combining these strategies on different platforms, you can significantly increase the visibility of your wooden projects and attract potential buyers interested in quality craftsmanship like yours.

Final Thoughts

Your journey into selling your first wooden project has just begun! Here are three key takeaways to remember as you craft, finish, price, and sell: 1. Choose Wisely: Select a project that aligns with your skills but challenges you slightly—this ensures both confidence in the process and potential for improvement. 2. Craft It Well: Pay attention to detail every step of the way from cutting to finishing. The quality of your work will speak volumes to your customer base. 3. Set Fair Prices: Research similar items online, understand what value customers are willing to pay for handmade pieces, and make a fair price that covers costs while offering a profit margin.

For tonight's small step: sketch out the outline or rough plan of your first wooden project idea on paper. This simple action will help you visualize and organize your thoughts before diving into the crafting process. Happy crafting!

Share:

Creating Custom Picture Frames from Scrap Wood

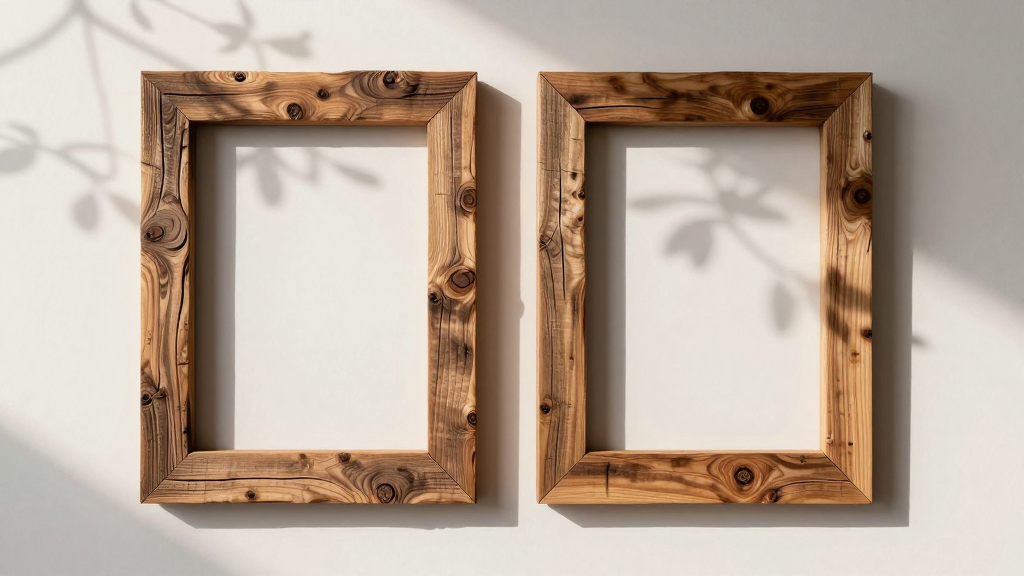
custom picture frames: Softly lit tree branches in a calm setting

Custom picture frames are not just about protecting your cherished memories—they can be a beautiful way to add a personal touch to your home decor. If you're someone who has been looking for unique projects to do with scrap wood, creating custom picture frames might be the perfect solution! In this article, we'll guide you through everything from gathering materials to upcycling ideas that will transform those pieces of leftover wood into stunning display pieces.

In this article:

Introduction to Custom Picture Frames

Creating custom picture frames from scrap wood is a delightful way to transform discarded pieces into personalized home decor items that add character to any room. This project combines DIY skills with upcycling, allowing you to turn ordinary materials into something beautiful and meaningful.

The process of making your own picture frames can be both therapeutic and rewarding. It not only offers a practical use for scrap wood but also provides an opportunity to express creativity through design choices. You could choose from various styles—ranging from rustic to modern—and customize the size, shape, or finish according to your preferences.

Whether you’re a seasoned DIY enthusiast or just starting out with crafting projects, this activity is accessible and fun. It’s an excellent way to reduce waste while enhancing your living space with unique pieces that tell stories of their own creation process. The satisfaction derived from turning something mundane into something special makes it well worth the effort!

Materials Needed for Scrap Wood Frames

Creating custom picture frames from scrap wood is a fun way to upcycle materials and add unique pieces to your home decor. Here’s what you’ll need:
  • Scrap Wood: This is the heart of your project, so choose wood that complements your overall design scheme or adds an interesting texture.
  • Pliers (wire cutters and needle-nose pliers): These tools will help you shape and bend metal strips if needed for a more intricate frame.
  • Sandpaper: Various grades of sandpaper are essential to smooth out your wood and prepare it for painting or staining.
  • Wood Glue (or Wood Varnish): This will help secure the pieces together, ensuring a sturdy frame. Choose a glue that dries clear if you plan on painting the frame later.
  • Caulking Gun and Caulk: To seal joints tightly for durability, use a caulk to fill any gaps between wood pieces.
  • Metal Strips or Wire (optional): If you want an extra decorative element, consider adding thin metal strips or wire around the edges of your frame. You can find these in hardware stores.
  • Paint or Stain (optional): To give your frame a finished look and protect it from wear, apply paint or stain to both sides of the wood pieces before assembling them.
  • Screwdriver: This tool is handy for securing small screws that may be necessary in your design, especially if you're attaching hardware like hooks or hinges.
Make sure to have a well-lit work area and wear protective gear such as gloves when handling sandpaper or cutting metal. With these materials at hand, you’re ready to start crafting your custom picture frames!

Step-by-Step Guide

Creating custom picture frames is a delightful way to transform scrap wood into something beautiful and functional. This guide will walk you through crafting your own frame using simple tools and techniques.

Tools Required: 1. Saw – For cutting the wood. 2. Sandpaper – Various grits for smoothing out rough edges. 3. Measuring Tape – Essential for ensuring precise dimensions. 4. Drill or Screwdriver – To assemble the frame with screws or nails (optional, depending on your chosen method). 5. Clamps – For holding pieces together securely while drying.

Materials Needed: 1. Scrap Wood Pieces – Choose pieces that are slightly wider than where you plan to put your picture and have enough length to accommodate a piece of glass. 2. Glass or Acrylic Sheet – To fit into the frame for protection, usually available at craft stores in various sizes.

Step-by-Step Instructions:

  • Measure and Cut: Measure the width of your photo and add an extra inch on either side if you want space around your picture (this is common). Cut two pieces of wood to this length using a saw.
  • Sand the Edges: Smooth out any rough edges with sandpaper to ensure a clean finish. Start with a coarse grit and work up to finer grits for a polished look.
  • Assemble the Sides: Attach your two side pieces together at one end using screws or nails, depending on what you prefer for assembly (drill holes first if using screws). Use clamps to keep them secure while they dry.
  • Measure the Length: Measure and cut another piece of wood to fit across the top and bottom of your frame. This should be slightly shorter than the side pieces so it can sit inside.
  • Attach the Top and Bottom Pieces: Attach this crosspiece between the two sides using screws or nails, again with clamps for stability while drying.
  • Measure the Glass/Acrylic Sheet: Use a drill to make pilot holes in your frame where you want the glass sheet to fit. Carefully place the glass sheet into your newly made frame and use additional screws/nails if necessary.
  • Final Sanding and Finishing (Optional): Sand any remaining rough edges or surfaces for a smoother look, then apply wood stain, paint, or varnish as desired.

Tips: - Consider the grain direction of your wood when cutting to avoid unevenness in appearance after sanding. - If using screws, pre-drill pilot holes to prevent splitting. - For a more rustic look, leave some edges unvarnished and use a clear sealant instead of varnish or paint for the inside parts.

By following these steps, you'll have crafted your very own custom picture frame from scrap wood. This project is not only rewarding but also incredibly cost-effective compared to buying pre-made frames. Enjoy making something unique that fits perfectly into your home decor!

Tranquil garden path with vibrant blooms

Finishing Touches and Tips

When you've crafted your custom picture frames from scrap wood, it's time to add the finishing touches that will make them truly special. Whether you opt for a sleek painted finish or a more rustic sealant, there are several ways to enhance the look of your DIY projects.

For painting, consider choosing a color that complements the tone and grain of your wood. If your wood has a natural brown hue, try using a light-colored paint to create a clean contrast or go bold with brighter tones for a vibrant effect. Apply two coats of primer followed by the chosen paint, allowing each coat to dry completely before adding the next.

Sealing the frame is essential to protect it from moisture and wear over time. Use an acrylic sealant, which can be applied in one layer after painting dries fully. This will give your frame a glossy or matte finish depending on the type of sealant you choose. Ensure all areas are sealed thoroughly for maximum durability.

Adding decorative elements can transform plain frames into works of art. Consider using stencils to create geometric patterns, adding small decals that tell a story about your project’s inspiration, or even incorporating subtle embellishments like lace or fabric strips for an elegant touch. For a more natural look, attach natural materials such as twine, wood slices, or even seashells.

Remember to keep the design simple and cohesive with your overall vision. A few carefully chosen decorations can make a big impact without overpowering the frame’s beauty. Experiment with different combinations until you find something that complements your custom picture frames perfectly!

With these finishing touches and tips in mind, you're well on your way to creating truly one-of-a-kind custom picture frames from scrap wood. Enjoy the process and be proud of what you've made!

Creative Ideas for Custom Picture Frames

When crafting custom picture frames from scrap wood, the sky is the limit when it comes to design inspiration! You can choose from a multitude of styles ranging from classic to modern, each adding unique charm to your home decor.

  • Minimalist Design: Start with simple lines and clean edges for a sleek look that complements any room. This style involves minimal embellishments or intricate patterns, focusing instead on the craftsmanship itself.
  • Geometric Patterns: Incorporate shapes like squares, triangles, and circles to create geometrically shaped frames. These can add a modern twist to your decor with sharp lines and bold contrasts.
  • Natural Textures: Use the natural grain of the wood as part of the frame design by leaving certain sections unfinished or incorporating rough edges for an organic feel.
  • Decorative Borders: Add decorative borders around the frame to enhance its appearance. This can be done with a variety of materials such as rope, leather strips, or even more wood pieces.
  • Puzzle Frame: Create a unique puzzle-like design by cutting the frame into interlocking sections. This adds an element of surprise and makes each piece special in itself.

Remember, one of the best parts about making custom picture frames from scrap wood is that you can experiment with designs to match your personal style or any theme you might have for a particular room. Let your imagination run wild, and enjoy turning simple scraps into something beautiful!

Conclusion

Creating custom picture frames from scrap wood is a fantastic way to transform discarded pieces into unique home decor items that are both beautiful and environmentally friendly. As you've gone through this project, I hope it’s clear how versatile scrap wood can be in fulfilling your creative needs.

  • Personal Satisfaction: Finishing the frames yourself offers immense personal satisfaction. Every piece of wood is different, so no two frames will ever look exactly alike, making each one a true reflection of your individuality and creativity.

Upcycling isn’t just about saving money; it's also about reducing waste and conserving resources. By repurposing scrap wood into something useful like picture frames, you’re helping to protect the environment. It’s an easy way to contribute to sustainability in your daily life without needing a major lifestyle change.

  • Eco-Friendly Decor: Picture frames made from recycled materials can be particularly appealing as eco-friendly home decor. They add warmth and character, especially when displayed alongside other upcycled items or natural elements like stones and branches.

For those who are new to woodworking or looking for a simple project to start with, making picture frames is an excellent choice. The process allows you to learn basic techniques without feeling overwhelmed by complexity. It's also a great way to connect with your family as you can involve them in the creation of these meaningful pieces.

  • Family Bonding: If you have children, this project could be an excellent activity for bonding and teaching them valuable life skills like problem-solving, patience, and creativity. Plus, they get to see their own handiwork displayed on the walls!

If you're interested in more upcycling projects or want to delve deeper into custom picture frames, consider exploring different styles and finishes. Experiment with various types of wood, stains, or glazes that can add a unique touch to your creations.

Frequently Asked Questions

What kind of wood is best for making custom picture frames?

For creating custom picture frames from scrap wood, choose wood that is sturdy yet easy to work with. Pine or birch are good choices due to their availability and ease of sanding. Avoid using highly figured woods like curly maple as they can be more difficult to shape without cracking. Ensure the wood is clean and free of knots or defects before starting your project.

Can I paint my wooden frames to match my decor?

You can certainly paint your custom picture frames to match your decor. Start by sanding the wood smooth for a better paint finish. Choose your desired color from a variety of paints or stains and apply them evenly with a brush or roller, allowing time between coats as recommended on the product label.

Final Thoughts

The journey of creating custom picture frames from scrap wood has been a fulfilling experience, showcasing both creativity and resourcefulness. By following these steps, you’ve learned that with just a few tools and some imagination, you can transform simple scraps into personalized pieces of art.

Remember, the most important takeaway is to embrace the process as an opportunity for self-expression and sustainability. The secondary key points are to always use scrap wood responsibly and consider how these frames could enhance your home decor.

So tonight, take that first step by gathering some scraps from around your house or a local recycling center. Begin with just one frame; it’s easier than you think! By starting this small project, you’ll not only contribute to the environment but also lay the foundation for more elaborate creations in the future.

Happy upcycling and happy dreaming!

Share:

Build Your Own DIY Wooden Bench

diy wooden bench: Introduction to Building Your Own Wooden Bench

Building your own DIY wooden bench is not only an enjoyable woodworking project but also a rewarding way to add rustic charm and functionality to any outdoor space. In this guide, you'll learn everything from selecting the right tools to step-by-step instructions on constructing your very own bench. Whether you're new to woodworking or looking for a practical outdoor piece of furniture, follow along as we walk you through the process, covering essential techniques like cutting, joinery, and finishing. By the end of this project, you'll have not only gained hands-on experience but also created a piece that will stand the test of time.

In this article:

Introduction to Building Your Own Wooden Bench

The DIY wooden bench project is a fun and rewarding build that combines basic woodworking skills with practical functionality. Whether you're looking to create a seating area in your backyard or add some character indoors, this step-by-step guide will walk you through building your very own custom bench.

Overview of the Project

Building a wooden bench is an excellent way to learn foundational woodworking techniques such as cutting, assembling, and finishing wood. The project is moderately challenging, suitable for intermediate DIY enthusiasts who have a basic understanding of tools and safety measures. The primary goal is to construct a sturdy and comfortable seating piece that complements your outdoor or indoor space.

Materials Needed

For this project, you'll need the following materials:

  • Wood: 2x4s (10 feet) for the legs
  • 3/4-inch hardwood boards for the seat top and backrest (8 feet total)
  • Plywood or particle board for additional support if needed (optional)
  • Wood glue
  • Wood screws (for joining pieces together)
  • Biscuits or dowels (for joinery options, optional)
  • Sandpaper: fine and medium grits
  • Paint or stain (to finish the bench)

If you’re working on a tight budget, consider using thinner boards for the seat top and backrest. You can find these at most hardware stores. For durability and appearance, hardwood is a great choice but you can use softwoods as well if that’s what you have available.

Tools Required

To build your wooden bench, you’ll need:

  • Table saw: Essential for making precise cuts
  • Circular saw: Alternative tool to cut wood boards
  • Chisel and mallet: Useful for trimming edges or shaping small details
  • Hand plane: For smoothing surfaces (optional)
  • Drill/driver: To drive screws into place
  • Combination square: For measuring angles and making precise cuts

If you don’t have access to a table saw, a circular saw will suffice but might be more challenging for accurate cuts. A hand plane can help in achieving a smooth finish on the edges of your pieces.

Safety Tips

Always wear safety gear when working with wood:

  • Gloves: To protect hands from splinters and dust.
  • Safety goggles or glasses: To shield eyes from flying debris.
  • Ear protection: To minimize noise exposure during power tool use.

Keep tools sharp to reduce the risk of injury. Use a push stick for safe cutting on your table saw, especially when dealing with long boards.

By following these guidelines and gathering all necessary materials and tools before you start, you’ll be well-prepared to embark on this woodworking project!

Tools Required for DIY Wooden Bench

To build your own DIY wooden bench, you'll need some essential tools to ensure the project goes smoothly from start to finish. Here’s what you’ll need:

  • Saw: For cutting wood to size and shaping pieces. A handsaw or a power saw like a table saw or band saw is ideal for this task.
  • Drill/Driver: Necessary for drilling holes, screwing together parts, and driving nails into the wood. Make sure you have a few drill bits of different sizes to accommodate your project’s needs.
  • Hammers: For setting nails or dowels in place when assembling the bench. Choose between a claw hammer (for removing nails) and a regular hammer, depending on your specific tasks.
  • Sandpaper: Various grits of sandpaper are essential for smoothing out rough edges after cutting, finishing cuts with a router or plane, and giving the final touch to make sure everything is smooth. Start with 120-grit paper for rough sanding and end up with finer grits like 220- or 320-grit.

For more detailed instructions on how to use these tools effectively, consider taking a basic woodworking class or watching some beginner-friendly tutorials online. These will help you understand the best practices for using each tool safely and efficiently, ensuring your bench project turns out well.

To build your own DIY wooden bench successfully, follow these detailed steps and tips for a smooth process: ### Step-by-Step Routine: 1. Measure the Space: Begin by determining where you want to place your bench and measure the area accurately using a tape measure or laser level. 2. Design Your Bench: Sketch out your design on paper, considering its dimensions (length, width, height), backrest style (if applicable), and any additional features like shelves. This will guide your cutting and assembling process. 3. Cutting Wood Pieces: Using your saw, cut the pieces of wood according to the measurements you’ve outlined. Ensure that all cuts are straight and accurate by using a try square or framing square for accuracy. 4. Assemble the Frame: Start with the main frame of the bench. Use pre-cut pieces and assemble them together with glue and screws. Make sure everything is aligned properly before adding any fasteners to ensure stability. 5. Add Side Panels: Cut the side panels based on your design sketch, then attach them to the frame using screws or dowels for a stronger joint. 6. Attach Seat and Backrest (if needed): If you’re including a seat and backrest in your bench, measure and cut these pieces to fit snugly within the frame structure. Secure them with glue and screws. ### Common Mistakes to Avoid: - Cutting Errors: Always double-check measurements before cutting to avoid mistakes that could lead to wasted wood or an improper fit. - Inconsistent Gluing: Ensure all surfaces are clean and dry; uneven gluing can cause misalignment later on. - Improper Assembly: Take your time with the assembly process, double-checking each step for accuracy. Loose joints might lead to a wobbly bench. ### Realistic Example: Building a Simple Bench Imagine you want to build a simple wooden bench that measures 48 inches long by 16 inches wide and 15 inches high. Start by selecting your wood pieces, ensuring they are of similar thickness for uniformity in the frame. Cut all necessary pieces according to measurements and assemble them with wood glue and screws. After assembly, sand each piece lightly before joining the seat and backrest if included. By following these steps carefully, you’ll increase the chances of a successful project that meets your design vision perfectly.

Step-by-Step Guide to Constructing a Wooden Bench

Step-by-Step Guide to Constructing a Wooden Bench

To build your own DIY wooden bench, follow these step-by-step instructions to assemble the frame and add finishing touches. This project is suitable for beginners with basic woodworking skills and access to simple tools.

Step 1: Gather Materials and Tools

  • Plywood Sheets: Choose a sturdy plywood, ideally 1/2 inch thick, as it's easy to cut and strong. Measure for the size of your bench.
  • Wood Screws: Use #8 x 2-inch wood screws with washers.
  • Screwdriver: A cordless drill or a manual screwdriver will be helpful but not essential.

Step 2: Cut the Plywood

Use a table saw to cut two pieces of plywood for the seat and backrest, each about 4 feet long and 1 foot wide. For the frame, cut four pieces at least 6 inches longer than you need them to be final length.

Step 3: Assemble the Frame

  • Start by laying out all your pieces on a flat surface. Place two long plywood pieces parallel and close together, forming one side of the frame. Use wood screws at about every foot to attach them securely.

  • Repeat this process with the other pair of long plywood pieces for the opposite side of the bench's frame. Ensure both sets are aligned and level before securing them.

  • Place a shorter piece in between each long pair to create a rectangular shape, forming the top structure of your bench frame. Screw it into place at regular intervals.

Step 4: Add the Seat and Backrest

  • Flip over the assembled frame so that the open sides are facing up. Lay the seat plywood across the top, aligning with the shorter pieces to create a rectangular seat.

  • Secure it in place with wood screws at each corner and along the edges of the bench's frame. Repeat this process for the backrest, making sure both are flush against the side panels.

Step 5: Finishing Touches

  • Once your bench is assembled, remove any excess wood or rough edges with a hand plane. Sand all surfaces to smooth them out using sandpaper grits starting from coarse (#80) and working up to fine (#220).

  • For finishing touches, apply a clear water-based polyurethane finish on the entire bench for durability and protection. Follow the manufacturer’s instructions carefully.

  • If desired, add decorative elements like a carved or painted accent to make your bench more personalized.

Step 6: Clean Up and Store

  • Wipe down the bench with a damp cloth after finishing. Allow it to dry completely before storing in an indoor area away from direct sunlight for longevity.

With these steps, you should now have a sturdy wooden bench ready to use or display outdoors! Remember to take care of your tools and materials, as well as the bench itself, to ensure it lasts long. Happy woodworking!

Finishing Touches and Customization Ideas

Once you've assembled your wooden bench using the techniques outlined earlier in this guide, it's time to give it a finishing touch that will make it stand out and reflect your personal style. The choice between painting or staining depends on whether you want the natural wood grain to remain visible or if you prefer a more uniform color.

Painting Your Wooden Bench

Painting is ideal for those who want to cover up imperfections in the wood surface and achieve a bold, vibrant look. Choose a primer before applying your paint to ensure even coverage and better adhesion. Select exterior-grade paints as they are designed to withstand outdoor conditions.

  • Choose Your Color: Consider what complements your outdoor space or personal decor preferences. Popular choices include blues for a coastal vibe, greens for a garden setting, or reds and yellows that add a pop of color to your patio.

Staining the Bench

If you prefer maintaining the natural beauty of the wood, staining is a great option. Stains enhance the grain and can make the bench appear richer in color. Start by applying a sealer to protect the wood from water and UV damage.

  • Select Your Stain Color: Lighter stains can bring out the natural beauty of lighter woods, while darker stains offer more depth for darker woods like oak or walnut.

When staining, make sure the wood is clean and dry. Apply the stain evenly in a single direction to avoid streaking. Allow it to dry thoroughly before applying any sealers or additional coats if necessary.

Adding Personal Touches

To personalize your wooden bench, consider adding decorative elements such as metal hardware, cushions, or custom engravings with a laser cutter or router. You can also use fabric scraps for seat covers to add a cozy touch or paint small patterns onto the legs.

  • Hardware: Adding metal brackets under the bench can give it an industrial look and may provide extra support depending on your design plans.

By following these finishing touches, you'll create a wooden bench that's not only functional but also visually appealing. Remember to always let any applied materials dry completely before moving or sitting on the bench to avoid any damage.

Frequently Asked Questions

What type of wood is best for building a wooden bench?

For a DIY wooden bench, use durable hardwoods like oak or walnut for their strength and beauty. Softwoods such as pine are cheaper but less resistant to wear.

Final Thoughts

To build your DIY wooden bench, remember to always prioritize safety by using appropriate protective gear like gloves and goggles when handling tools and materials.

Secondly, ensure a clean work area by organizing your tools and workspace to avoid accidents or mistakes during construction.

Lastly, don't forget to have fun with your project! Whether you choose to paint it or add some unique carvings, let creativity guide you. As for your first step tonight, pick up the focus keyword: "DIY wooden bench" and start gathering your tools and materials before heading back home.

Share:

Cari Blog Ini

Powered by Blogger.

Label

Recent Posts

Pages